

AYSO Procedures
AYSO is a volume style picture day meaning lots of subjects, basic poses, and not a lot of time. High quality images are none the less expected from every shot.

SHOOT INFO
POC: IVee Yamada
Set up Time: 6:30am
Start Time : 7:30 am
LOCATION: Kapiolani Park
22 Teams
10U - 12U
1 Camera
Using Blueprint Tethered
Shoot Towards Waikiki Shell in the ditch
Shoot Full Body
Chris- Photographer
Glenn- Poser
Kai- Image # Recorder


Sample Shot of Individual. Shooting Towards Shell. Exposure should look like this

Sample Shot of Coaches Picture. Shooting Towards Shell. Exposure should look like this
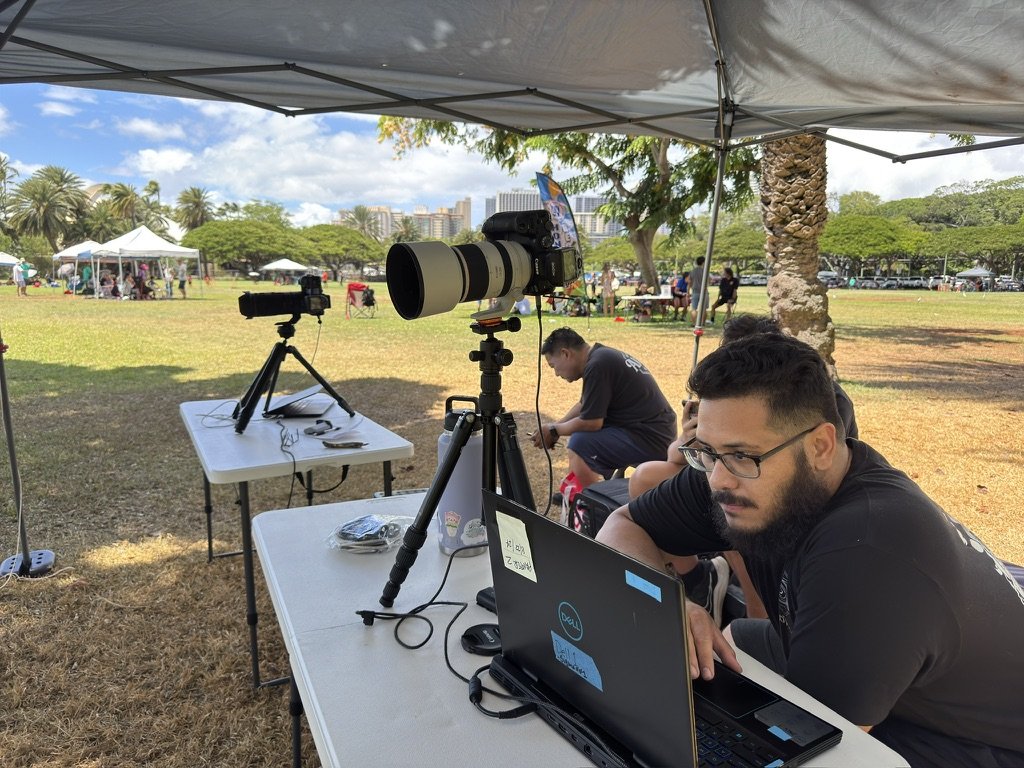
Picture Day Setup
Camera Setup
Cameras are set up on foldable tables on tripods
Laptops are connected to each camera using camera cable
Generator is setup 50 feet away from picture taking area downwind
Laptops should be plugged in to the generator for power
Subject Markers should be placed for consistency.
ALL Lights are weighted down to prevent falling
Tent (if used) Should be staked down and weighted
All spare equipment and bags are stored behind the photographers, neatly and closed

Computer Setup
Computers are open and running Captura Workflow (Blueprint)
Go to the Job tab
Open Job “SPORTS- AYSO Spring 2025”
Click Tethered Capture “Start Session”
Open EOS Capture
Start Capture session
Images should go to a folder on the desktop labeled “AYSO SPRING 2025 Images”
In Blueprint Capture go to settings
Scroll down to Camera hot folder
Click Enable Watching
Click browse and select the folder on the desktop labeled “AYSO SPRING 2025 Images”
You are now ready to shoot
Data In Blueprint (Captura)
Data Columns are assigned to specific info from the Roster. Below is a guide to what column is what in blueprint.
BLUEPRINT -> Roaster
Year -> Division (10U Boys)
Teacher -> Coach (Choy)
Homeroom -> Temp Team Name (Choy 10U Boys)
Organization -> Team Name (Fire Tigers)
First Name -> Players First Name
Last Name -> Players Last Name
Subject Type -> Player of Coach
Custom Data 1 -> Position (Assistant Coach, Coach)
WORKFLOW
Individual Photos
Players form a line along side the tent
Photographer asks for the first and last name of the first player
photographer searches name in Blueprint
DOUBLE CHECK THE NAME MATCHED THE PLAYER
Click on the name to shoot the the players profile
Take 3 Photos- Eyes must be open, pose is good, exposure is good
Read Image number to image number recorder
Thank the player and say “thank you, you’re all set”
call the next player and get their name
repeat
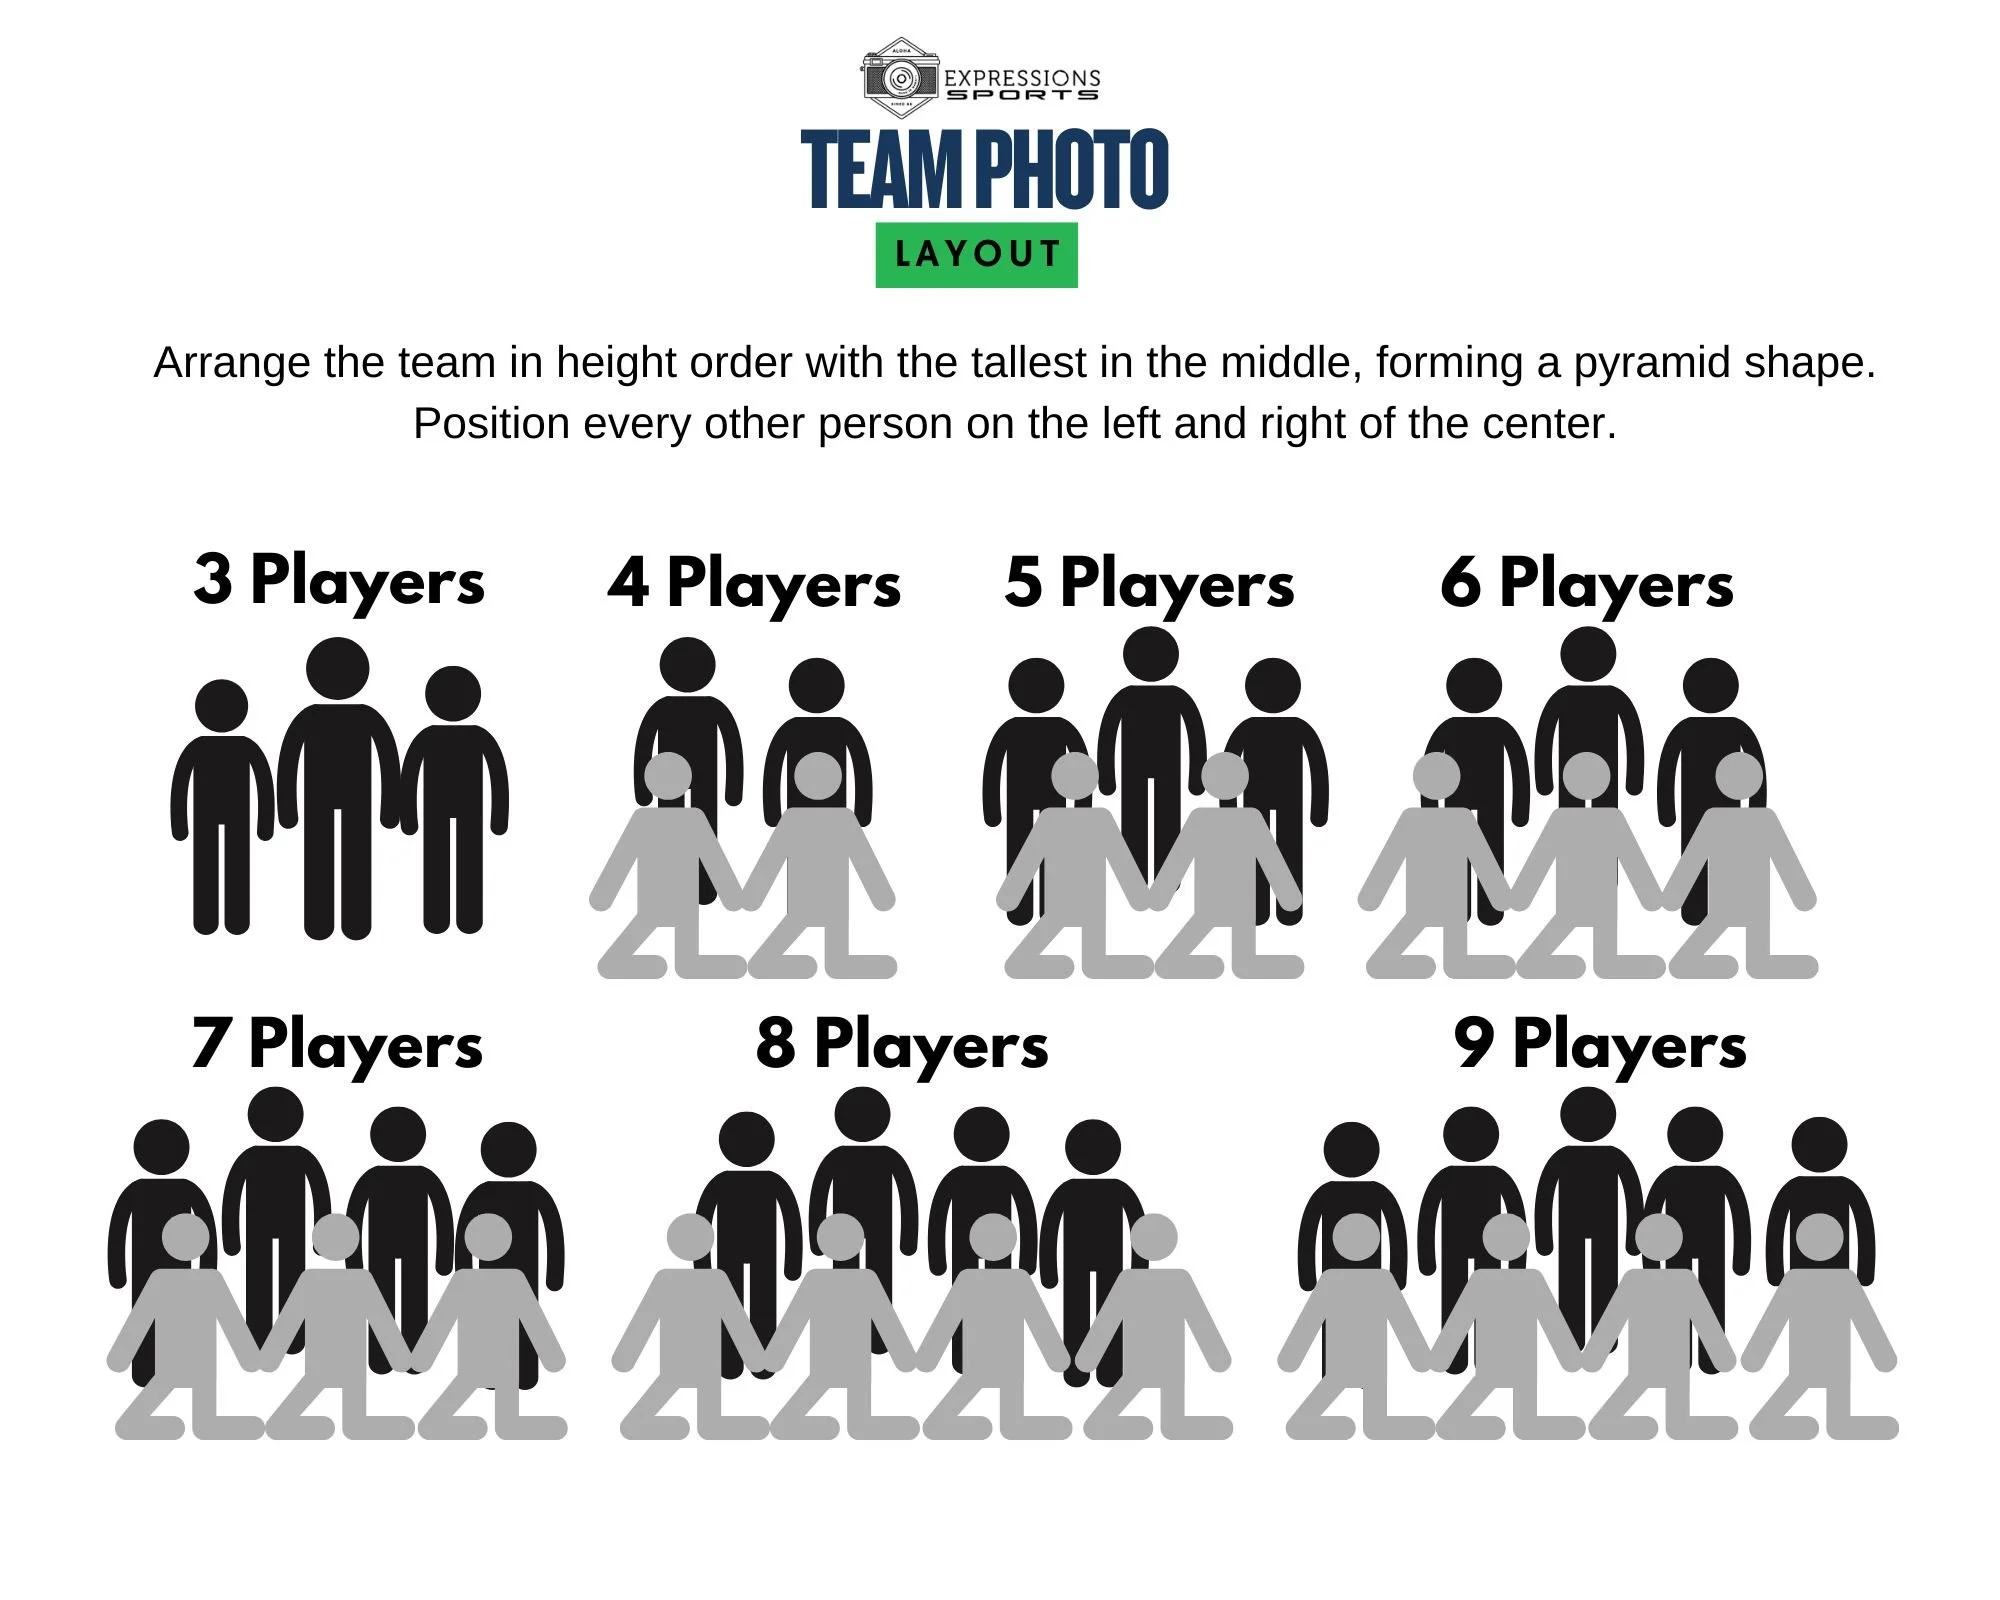
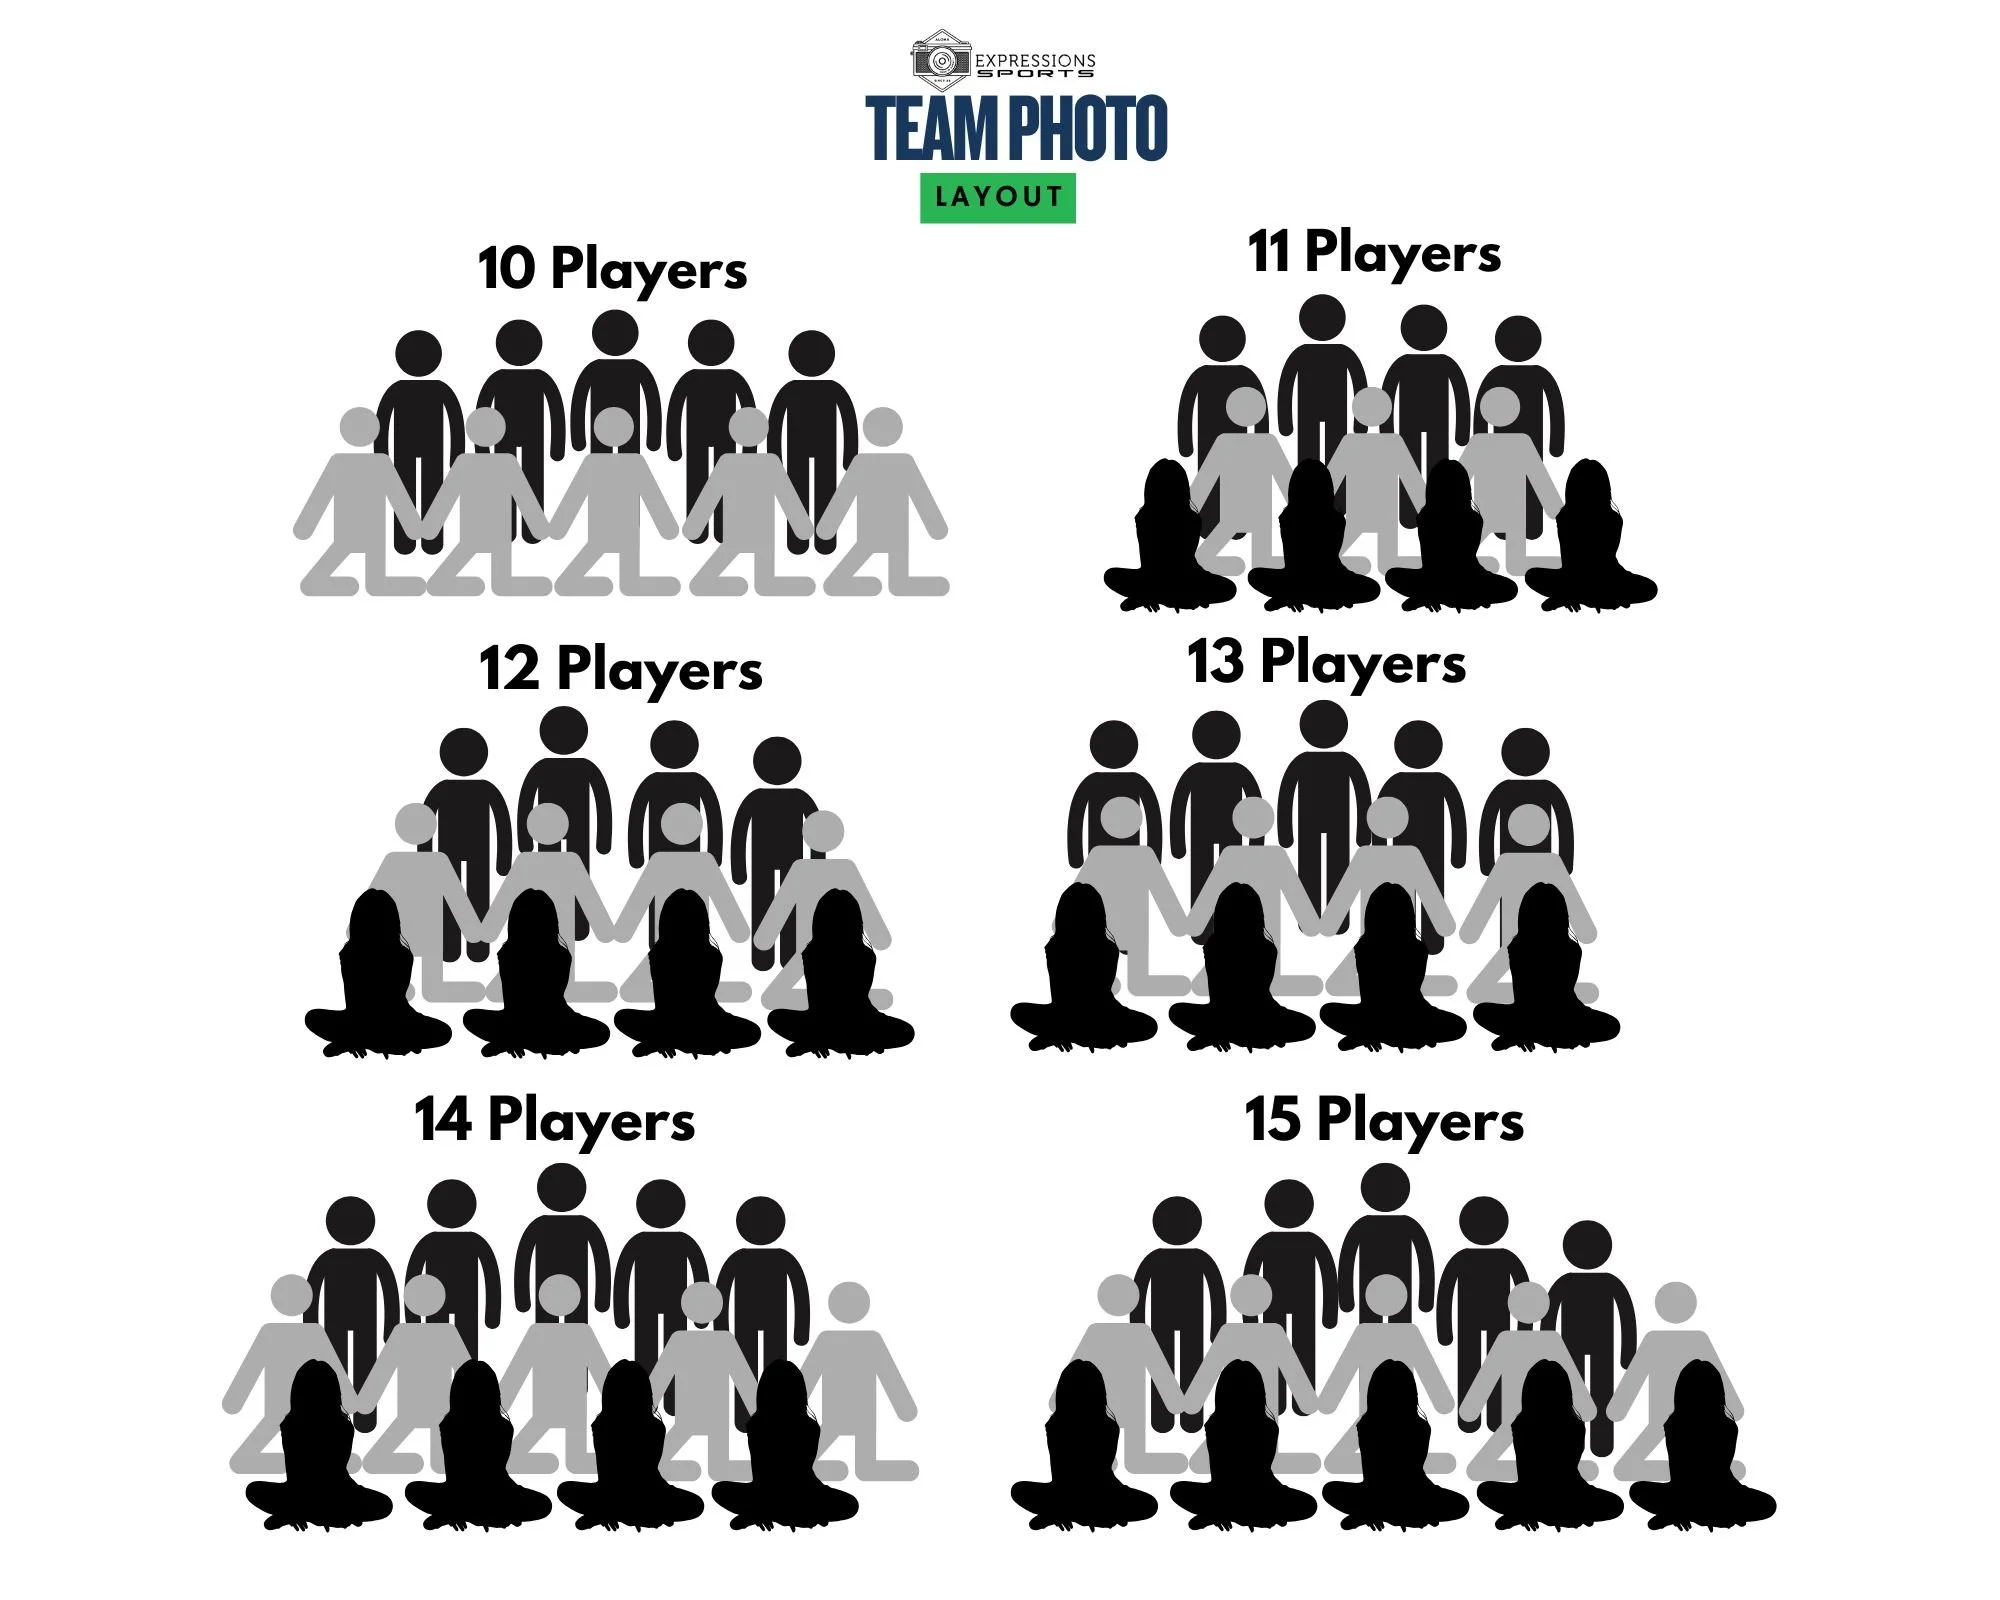
Team Photos
After all players have taken their individual photo gather the team and line them up by height order
You should make 2 or 3 rows following the team photo guide below
Coaches go on the side in the back row. One on either side or evenly split
In Blueprint go to Groups -> and select the appropriate group
Groups will appear as team names OR the Temp Team name (Choy 10U Boys)
Take a minimum of 5 photos to ensure eyes are open and account for possible mistakes.
Say “Thank you Team you are all set, have a great day”
Coaches Photo
Look up coaches name
Subject type should be Coach
make sure the team matches the rest of the team you are shooting (WARNING: Some coaches are part of multiple teams. Be sure you are photographing to the right one)
Take 2 photos making sure eyes are open and exposure is set
Sample Graphics

Memory Mate

Team Photo- Design is slightly changed from what is shown